
If you’re shopping for an off-grid solar kit, the first trap is thinking you need a whole-house setup. Most of us don’t. You need a kit that matches your actual loads and the space you have for panels and batteries. The good news: with a little watt-hour math and a few smart choices, you can build a reliable system for home backup, an RV, a small cabin, or weekend camping.
By “off-grid solar kit” we mean a bundle that includes solar panels, a charge controller, mounting and wiring, and usually an inverter. Some kits add batteries and an inverter/charger. These kits are built for places where you are not tied to the grid or you want backup when the grid goes down: cabins, RVs and vans, tiny homes, sheds, job sites, and rural homes with frequent outages.
This guide keeps it simple. We sized and picked kits based on real daily usage, not ideal lab numbers. We weighed panel output, MPPT vs PWM controllers, inverter capacity and surge, battery chemistry and expandability, build quality, and support. We also look at installation complexity, cable lengths that actually reach, and what the kit can realistically run.
Limitations to know up front: winter sun can cut your daily harvest in half, and shaded roofs will hurt any kit. Most portable kits will not start a deep well pump or run central air. If you need critical loads like a furnace fan, fridge, lights, and internet during an outage, size for those first and ignore non-essentials.
Quick Comparison
Do this first: list what you need to run for 24 hours. Write watts and hours for each item, then total watt-hours. Example: fridge 120 W for 8 hours is about 960 Wh, LED lights 60 W for 5 hours is 300 Wh, router 10 W for 24 hours is 240 Wh. That’s 1,500 Wh per day. Now you have a target for battery capacity and panel watts. We use this same load math throughout, so keep your list handy.
What matters most in a kit
- MPPT charge controller for anything over 200 W of panels, especially in cold or mixed sun
- Inverter type and size: pure sine, with continuous and surge watts that match your biggest startup load
- Battery chemistry and capacity: lithium iron phosphate for cycle life and usable capacity, AGM for lower upfront cost and cold tolerance
- Real-world solar harvest: panels rarely hit nameplate, plan around 4 to 6 sun hours in summer and 2 to 4 in winter
- Expandability: room to add panels or batteries later without replacing the core components
- Hardware and warranty: mounting that actually fits your roof or rack, cables that are long enough, support you can reach
Quick picks at a glance
We sorted the top off-grid solar panel kits by use case and spec fit. The comparison table in this guide highlights:
- Panel wattage and controller type so you know daily harvest and efficiency
- Battery compatibility and whether a battery is included
- Inverter class, continuous and peak watts, and built-in charger options
- Best-for tags covering home backup, cabins, RVs and vans, and portable camping
- Expandability notes so you can see what grows with you and what does not
Use that table as your filter. If a kit’s inverter can’t handle your biggest startup load, or the controller is PWM on a larger array, skip it.
Quick picks by scenario
Home backup and outages
- Aim for a 24 or 48 V system if you plan to expand beyond 1,000 W of panels.
- Pick a pure sine inverter with at least 2x your largest startup load. A fridge or small well pump often needs 1,500 to 2,000 W surge.
- Favor LFP batteries for usable capacity and cycle life. Add a transfer switch and critical loads subpanel for safe operation.
RVs and vans
- Space is your limit. A 400 to 800 W array with an MPPT controller is a sweet spot for most solar kits for RV setups.
- Use a 12 V system to play nice with RV appliances. Choose an inverter/charger to top up from shore power when parked.
- Keep wiring runs short and pick panels sized for your roof layout.
Cabins and tiny homes
- For off-grid solar kits for cabins, start with at least 800 to 1,200 W of panels and a 24 V bank. It keeps wire size down and leaves room to grow.
- A 2,000 to 3,000 W pure sine inverter covers lights, a fridge, tools, and a small microwave. Electric water heaters and baseboard heat are impractical on small kits.
- If winters are cloudy, double the array or plan on a generator assist and an inverter/charger.
1. ECO-WORTHY 1200W 24V Off-Grid Solar Kit with Lithium Batteries and 3000W Inverter
Best Budget Kit
Off-grid made easy: dual-axis tracking boosts output, 7.2kWh Li-ion storage + 3000W inverter power your essentials, with Bluetooth monitoring. See if it fits your setup.
$2,299.99 on Amazon
Price and availability are accurate as of 06/20/2026 04:39 pm GMT and are subject to change.
This is a strong budget pick for cabins, tiny homes, and anyone who wants a ready bundle that can actually run day‑to‑day essentials. The 7.2 kWh lithium battery bank gives roughly 5 to 6 kWh of usable energy in normal practice, which covers a modern fridge, lights, internet, phone charging, and a few hours of laptop time with margin. The 3000W inverter has enough muscle for a 1000 to 1500W microwave or coffee maker, plus lights and a fridge, as long as you stagger starts.
We like the value and the dual‑axis tracking. In decent sun, a 1200W array typically nets around 4 to 6 kWh per day after losses. With a tracker pushing panels toward the sun all day, you can pick up more harvest, especially in winter and mornings. That makes a real difference for off‑grid living where every watt matters.
Trade‑offs: the tracker adds moving parts and installation work. It also needs proper footing and guying for wind. If you cannot ground‑mount, or you camp in tight spots, a fixed roof array may be simpler. Also, plan your loads. Big well pumps, electric heaters, or AC units will overwhelm this class of kit.
Practical tip: list your daily loads in watt‑hours, aim for 20 to 30 percent battery reserve, and do heavy charging or cooking midday when the tracker is making peak power. If you want the full component breakdown and specs, see the kit page here ECO-WORTHY 1200W 24V Off-Grid Solar Kit with Lithium Batteries and 3000W Inverter.
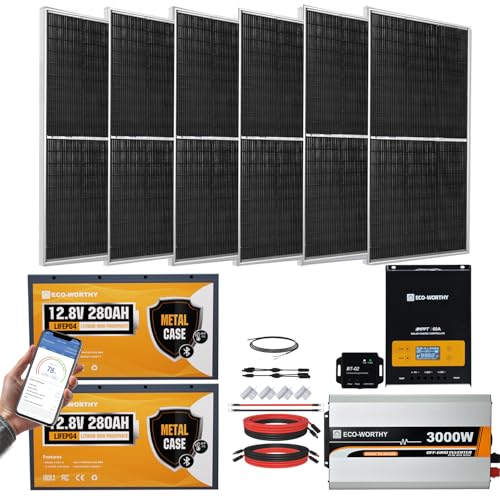
2. ECO-WORTHY 10kW Off-Grid Solar Kit with 12x195W Panels, 9.36kWh Lithium Storage, 120/240V Inverter
Best Home Backup

Turn sunshine into off-grid backup: ~9.36kWh/day, 120/240V for big appliances, app monitoring, UL-certified safety, expandable to 60kW. Want to see if it fits?
$4,799.99 on Amazon
Price and availability are accurate as of 06/20/2026 05:04 pm GMT and are subject to change.
If you want a true home-backup capable kit with split-phase power for well pumps, shop tools, or a 240V appliance, this is the one to look at. The ECO-WORTHY 10kW Off-Grid Solar Kit pairs a 120/240V inverter with 9.36 kWh of lithium storage and a practical 12-panel array. It is a solid fit for houses in outage-prone areas and full-time cabins that need real circuits, not just a few USB ports. You can check current details here: ECO-WORTHY 10kW Off-Grid Solar Kit with 12x195W Panels, 9.36kWh Lithium Storage, 120/240V Inverter.
We picked it because it covers what most homes actually need: 120V circuits for lights, fridge, router, and outlets, plus 240V capability for a well pump or similar loads. The 9.36 kWh battery gives you a realistic day of essentials if you manage usage. For context, a typical fridge uses about 1 to 1.5 kWh per day, lights around 0.2 to 0.5 kWh, and a well pump might add 1 to 2 kWh depending on use. The 12x195W array can replenish several kWh on clear days, so if you shift heavy tasks like laundry or power tools to midday, you keep the battery in a comfortable range.
Trade-offs: this is not a plug-and-play RV kit. Twelve panels take space, the wiring is more complex, and tying into a home safely calls for a transfer switch and code-aware installation. The 195W modules mean more pieces to mount than a handful of larger panels, but the kit’s split-phase inverter, UL-certified safety, app monitoring, and expansion path make it a strong home-backup foundation.
Practical tip: list your top five loads and their watts, then set the inverter and battery protections to match. Stagger big appliances so only one high-draw device runs at a time, and schedule those for peak sun. That small habit squeezes far more runtime out of this system.
3. ECO-WORTHY 200W 12/24V Monocrystalline Solar Panel Kit with 30A PWM Controller for RVs & Off-Grid
Best portable starter kit

Get off-grid power fast: 200W mono panels deliver up to 800Wh/day. Rugged, easy install, 12/24V ready—ideal for RVs, boats, cabins. Curious if it fits your setup?
$169.98 on Amazon
Price and availability are accurate as of 06/21/2026 02:22 am GMT and are subject to change.
This kit is for weekend RVers, van builds, small boats, or off-grid sheds that need basic power without a big install. Think LED lights, phones, a fan, and keeping a 12V battery topped up. In summer sun it can support a small 12V fridge if you manage usage. If you want a simple first step into solar for your rig, this one ECO-WORTHY 200W 12/24V Monocrystalline Solar Panel Kit with 30A PWM Controller for RVs & Off-Grid fits that brief.
We picked it because 200W is a practical starting point. The monocrystalline panels are efficient for the size, the 30A PWM controller is dead simple, and the 12/24V support covers most small battery banks. In real life you can expect roughly 500 to 800 Wh on a sunny day, which is enough for lights, devices, and light-duty DC loads.
The trade-offs are straight. A PWM controller gives up some harvest compared to MPPT, especially in cold or hazy conditions. At 200W you do not have much headroom for bad weather or hungry AC loads. Plan on adding your own battery and a pure sine inverter if you want to run AC outlets, and be realistic about what a 200W array can do.
Practical tip: pair it with a 12V LiFePO4 around 100 Ah for a balanced starter setup. Fuse at the battery, keep wire runs short and sized for current, and set the controller to the correct battery type. If you need more later, add panel watts modestly, then step up to an MPPT controller when you outgrow PWM.
4. VEVOR 800W 12V Off-Grid Solar Kit with 4×200W Panels, 300Ah LiFePO4 and 2000W Inverter
Best for cabins

Go off-grid easily: 800W panels + 12.8V 300Ah LiFePO4 give up to 3.2kWh/day and long life. 60A MPPT, 2000W pure sine inverter. Rugged, simple install for RVs/cabins.
Price and availability are accurate as of 06/20/2026 10:07 am GMT and are subject to change.
If you’re outfitting a small cabin, hunting camp, or an RV that needs real off-grid power, this kit hits the sweet spot. You get 800W of panels, a 12.8V 300Ah LiFePO4 battery, a 60A MPPT controller, and a 2000W pure sine inverter in one box. It’s enough for lights, a fridge, Wi-Fi, device charging, fans, and short microwave runs without juggling mismatched parts. See the full VEVOR 800W 12V Off-Grid Solar Kit with 4×200W Panels, 300Ah LiFePO4 and 2000W Inverter for what’s included and current pricing.
We picked it because the mix is practical. The array can deliver up to about 3.2 kWh on a good day, and the lithium bank offers roughly cabin-size storage without a huge footprint. The MPPT controller is sized right for 800W, and a 2000W inverter covers typical household plug loads cleanly.
Trade-offs are simple. This is a 12V system, so current is higher and wire runs need to be short and sized correctly to avoid voltage drop. The 2000W inverter won’t run big resistive heaters, central AC, or deep well pumps. If you plan to add a lot more panels later, a 24V or 48V path scales easier.
Practical tip: mount the four 200W panels with clear airflow and proper tilt if you can, keep cable runs short, and follow the manual for conductor sizing and fusing. For cabins, use a transfer switch or a small subpanel rather than backfeeding outlets. That keeps things safe and code-friendly.
FAQ
Setup
Q: Do I need MPPT or PWM, and what size charge controller?
A: Use MPPT unless your array is very small. Rule of thumb:
- Choose MPPT for 300W+ arrays, cold climates, or when wiring panels in series.
- PWM is OK for budget 100–200W 12V setups.
Size it like this: controller amps ≥ array watts ÷ battery bank volts. Add 20% headroom. Examples:
- 400W into 12V: 400 ÷ 12 = 33A → pick 40A MPPT.
- 800W into 24V: 800 ÷ 24 = 33A → pick 40–60A MPPT.
Check controller VOC and ISC limits against your panel string.
Buying decisions
Q: Can I mix batteries or add capacity later?
A: Don’t mix chemistries or old and new batteries on the same bank. If you plan to expand:
- Stick to the same brand, model, voltage, and capacity.
- Add in parallel at the same voltage (12/24/48V) rather than changing system voltage later.
- Lithium (LiFePO4) gives 80–100% usable capacity, long life, and lighter weight. AGM/gel are cheaper upfront but heavier with ~50% usable capacity.
- If you must add to an older bank, isolate the new bank with its own BMS and charger or replace the whole bank.
Portability & power stations
Q: Portable suitcase panels vs a fixed roof/cabin kit: which should I buy?
A: Go portable if you weekend camp, park in shade, or need airline/trunk convenience. Setup takes time and they’re easier to steal. Go fixed if you full-time RV, want charge while driving, or have a cabin. Fixed wins on cost per watt, output in wind, and “always-on” charging. Many folks carry one portable panel to chase sun even with a roof array.
Q: Can I use an off-grid solar kit with a solar generator/power station?
A: Yes, if the panel voltage and connectors match the power station’s PV input. Check:
- Open-circuit voltage (VOC) and current limits. Stay under both.
- Use MC4-to-brand adapters as needed. Series strings can exceed VOC fast in cold weather.
- Plug panels into the DC PV input, not the AC inverter output from a kit. Never backfeed a power station from another inverter.
If you remember one thing, make it this: size the kit to your real loads, not to a dream list. Write down what you will run, for how long, and let the math pick the kit. That choice drives everything else. Panel watts, battery size, inverter class, even wire gauge.
The next step is about fit. RV and van? Keep it simple, efficient, and light. Cabin or tiny home? Step up to 24V or 48V with room to grow. Home backup? Focus on an inverter/charger that plays nice with a transfer switch and has clear expansion paths.
Good news. You likely need less than you think for essentials. A fridge, lights, chargers, and Wi-Fi can live comfortably on a mid-size array and 2 to 5 kWh of lithium storage. Plan for winter sun if you live up north. Overpanel a bit, and pick MPPT over PWM for anything past a small RV setup.
If you are still unsure, start with a portable kit or solar generator and add fixed panels later. It is better to get 80% right and build on it than to buy a monster kit that never gets installed.
Your next steps: a fast action plan
1) Do the load math
- List devices, watts, and hours per day. Add them up for daily watt-hours.
- Multiply by 1.3 to 1.6 to cover inverter losses and cloudy days.
- Translate to battery size. Lithium gives you about 90% usable, AGM about 50%.
Quick rule: 1,500 Wh per day needs about 1.8 kWh of lithium or 3 kWh of AGM for one day of autonomy. Two days needs double.
2) Pick system voltage and inverter class
- 12V: small RV or van, solar arrays under about 600 W, inverters under 1,500 W.
- 24V: mid-size RVs and off-grid cabins, 600 to 1,600 W arrays, 2,000 to 3,000 W inverters.
- 48V: cabins and home backup with 3,000+ W inverters and bigger arrays.
Choose pure sine wave. Size continuous watts to your largest running load and surge to 2x for motor starts.
3) Right-size the array for your location
- Use realistic sun hours. Summer 5 to 6. Winter can be 2 to 4 in many northern states.
- Aim for solar input equal to 1.2 to 1.8 times your daily Wh to recharge in one good day.
- Prefer MPPT on anything beyond a basic 200 to 400 W RV kit. MPPT is more tolerant of cold, shade, and mixed panel temps.
Remember STC vs real output. A 200 W panel might average 140 to 170 W in real noon sun.
4) Plan the install and expansion
- Map where panels will go, how you will route wires, and where batteries live.
- Leave space to add another panel string or battery. Check the controller’s max PV and the inverter/charger’s limits.
- For home backup, pick an inverter/charger that supports a transfer switch and has clear grounding instructions.
5) Sanity-check your budget and timeline
- Expect small solar kits for RV to be the cheapest and fastest to install.
- Off-grid solar kits for cabins cost more because of batteries, mounting, and wire runs.
- Home backup setups are the most complex. Get a pro for transfer switches and code.
Special cases, safety, and when to call a pro
Cold climates and battery care
Lithium batteries do not like charging below freezing. Either choose LFP packs with low-temp charging protection, keep them in a conditioned space, or add heat pads with thermostats. AGM works in the cold but is heavier and has half the usable capacity. If winter is your season, overpanel by 25 to 50%, tilt your array, and keep snow off panels.
Shaded sites and roof limits
Heavy tree cover kills solar production. Try a ground rack in a sunny spot or a pole mount you can tilt seasonally. RV roofs fill up fast. If you need more than 600 to 800 W on a small rig, consider a portable ground array for campsite use. Shading on one panel can drag a whole string. Use parallel wiring or optimizers if shade is unavoidable.
Transfer switches and code
For any home backup tie-in, use a listed transfer switch or interlock. Do not backfeed a panel through a dryer outlet. Bonding and grounding differ by inverter model. Follow the manual and local code. If you are not comfortable with AC wiring, hire a licensed electrician. It is cheaper than replacing an inverter or failing an inspection.
Heat, ventilation, and mounting
Inverters and charge controllers need airflow. Do not stuff them in a sealed closet. Batteries need a dry, cool spot. AGM banks require ventilation. Use proper roof mounts with flashing or RV-specific brackets. Torque your lugs, strain-relieve cables, and use UV-rated wire management.
When a solar generator makes more sense
Short outages, apartment living, or renters often do better with a solar generator plus folding panels. It is quiet, safe indoors, and zero-install. If you later buy fixed panels, many units accept external solar, so you can grow into a hybrid setup.
Decision recap: choose your path
RVs and vans
Target 200 to 600 W of panels, a 1,000 to 2,000 W pure sine inverter, and 1 to 2 kWh of lithium. Use a 12V bank, MPPT controller, and keep the wiring short and neat. A portable briefcase panel adds flexibility for shade parking.
Small cabins and tiny homes
Step to 24V. Plan 800 to 1,600 W of panels and 3 to 5 kWh of lithium for essentials. Choose a 2,000 to 3,000 W inverter/charger that can handle a well pump or fridge starts. Design for expansion if you will add a freezer or tools later. This is the sweet spot for off-grid solar kits for cabins.
Home backup essentials
Look at 48V or integrated power kits with a robust inverter/charger. Start around 3 to 5 kWh of storage and 1,200 to 2,400 W of solar if you want meaningful recharge. Tie in with a transfer switch and set realistic goals: fridge, lights, network, a few outlets. Heat and central AC are usually out unless you invest in a much larger system.
Final checklist you can reuse
- List loads with watts and hours. Get daily Wh.
- Pick system voltage based on inverter size and array watts.
- Size batteries to at least 1 to 2 days of autonomy at your usable capacity.
- Choose MPPT for anything beyond a small RV array.
- Overpanel modestly for winter or if you use power early and late in the day.
- Plan wire routes, fusing, and mounting before you buy.
- For home backup, use a transfer switch and follow code.
That is it. Do the math, pick the right voltage, and choose a kit that fits your roof, your climate, and your patience for installation. If you want to go deeper, read up on off-grid solar panel system sizing and compare a solar kit for RV life against a cabin-focused kit before you spend.